sexta-feira, 30 de novembro de 2012

Silver Polka Dots


Olá pessoal!

Amanhã já é Dezembro, o mês do Natal. Bem hoje venho mostrar vos um tutorial bem simples, usei apenas 3 cores. Espero que gostem!


Hello everybody!

Tomorrow is already December, the Christmas month. Well today I show you a very simple tutorial, I used only 3 colors. Hope you enjoy


Os vernizes que usei:
The nail polish that I used:


 Usei este verniz preto da "KIKO" nº275 como fundo/base para a nail art
I used this black nail polsih "KIKO" nº275 as background / base for the nail art.


Usei este verniz branco da "flormar" P103 para as bolas maiores
I used this white nail polish "flormar" P103 for the larger dots


Usei este verniz prateado da "Yes Love", cor 456 para as bolinhas mais pequenas
I used this silver nail polish of "Yes Love," color 456 for the smaller dots


Para as bolas maiores eu usei esta dotting tool 
For the larger ball i used this dotting tool


 Para as bolas mais pequenas eu usei esta dotting tool mais pequena
For the smaller balls I used this smaller dotting tool

TUTORIAL:


1. Aplicar uma base para proteger a unha.
1. Apply a base to protect the nail.


2. Aplicar duas camadas finas do verniz escolhido para o fundo/base da nail art.
2. Apply two thin layers of the chosen nail polish for the background / base of the nail art.


3. Com a ajuda de uma dotting tool , faz bolinhas ligeiramente grandes
3. With the help of a dotting tool, make large dots .


4. Com a ajuda de uma dotting tool, faz bolinhas mais pequenas por cimas das que já foram feitas.
4. With the help of a dotting tool, make smaller dots over the already made.


5. Por fim, aplicar um top coat para proteger o desenho.
5. Finally, apply a top coat to protect the design.

Espero que tenham gostado.
I hope you enjoyed. 

Ana Mendes


domingo, 25 de novembro de 2012

Pink and white


Olá pessoal!

Bem o fim-de-semana já está a acabar, amanhã já é dia de escola.
Bem hoje venho vos mostrar um tutorial bem colorido, em  tons rosa. Espero que gostem!


Hello everybody!

Well the weekend is already over, tomorrow is a school day.
Well today I show you a tutorial well colored in pink tones. Hope you enjoy!


Os vernizes que usei:
The nail polish that I used:

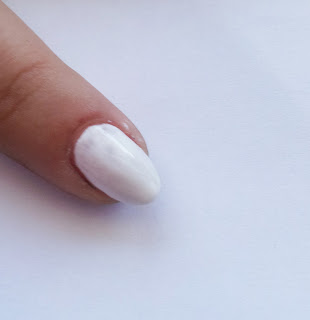
  Usei este verniz branco da "flormar" P103 como fundo/base para a nail art
I used this white nail polsih "flormar" P103 as background / base for the nail art.

  
Usei este verniz rosa fluorescente da "NEON" 
I used this pink nail polish "NEON"


 Usei este verniz rosa claro da "LETICIA WELL"
 I used this light pink nail polish of "LETICIA WEEL"


 Usei este verniz laranja da "CLICHÉ" o 6º sentido
I used this orange nail polish "CLICHE" the 6th sense


Usei este verniz da "KIKO" nº 414
 I used this purple nail polish of "KIKO" nº 414


Usei este verniz rosa da "KIKO" nº 413.
I used this pink nail polish of "KIKO" nº 413.


 Usei este topcoat da "essence" gel-look.
I used this topcoat of "essence" gel-look


Para fazer as riscas usei esta fita adevisa para nail art.
To make the stripes I used this 3D Design nail sticker.

TUTORIAL:


1. Aplicar uma base para proteger a unha.
2. Aplicar duas camadas finas do verniz escolhido para o fundo/base da nail art.
1. Apply a base to protect the nail.
2. Apply two thin layers of the chosen nail polish for the background / base of the nail art.


3. Cortar pequenas tiras da fita adesiva e aplicar  na diagonal.
3. Cut small strips of the nail sticker and apply  diagonally.


4. Aplicar uma camada de  verniz por cima da fita cola. 
4. Apply a layer of nail polish over the tape. 


5. Depois da aplicação do verniz, retirar de imediato a fita cola para um aspecto mais limpo.
5. After applying the nail polish, immediately remove the tape to a cleaner appearance.


6. Por fim, aplicar um top coat para proteger o desenho.
6. Finally, apply a top coat to protect the design.

Espero que tenham gostado.
I hope you enjoyed. 

Ana Mendes


domingo, 18 de novembro de 2012

Caviar nails

Olá pessoal!

Hoje já é sexta-feira, como é que voces estão?
Bem hoje venho vos mostrar um tutorial bem engraçado com "caviar", são bolinhas pequenas e coloridas para fazer nail art. Para esta nail art eu fiz  as minhas unhas todas diferentes. Espero de gostem!


Hello everybody!

Today is Friday, how are you guys?
Well today I show you a tutorial pretty funny with "caviar", are small and colorful balls to do nail art. For this nail art I did my nails all different. I hope to enjoy!


Os vernizes que usei:
The nail polish that I used:


 Usei este verniz branco da "flormar" P103 como fundo/base para o dedo médio.
I used this white nail polsih "flormar" P103 as background / base for the middle finger.


 Usei este verniz verde escuro da "CLICHÉ",  o jade como fundo/base para o dedo mindinho.
 I used this  dark green nail polish "CLICHE" jade as background / base for the little finger


 Usei este verniz laranja claro da "CLICHÉ",  o Maldivas como fundo/base para o dedo indicador.
 I used this light orange nail polish of "CLICHE" Maldivas as background / base for the index finger.


 Usei este verniz laranja  da "CLICHÉ",  o 6º Sentido como fundo/base para o dedo anular.
 I used this orange nail polish "CLICHE",  6º Sentido as background / base for the ring finger.


 Usei este verniz azul com pequenos brilhantes  da "CLICHÉ",  o Siamês  como fundo/base para o polegar.
I used this blu nail polish with shimmer  "CLICHE",  Siamês as background / base for the thumb.


Para fazer os desenhos nas unhas usei estas pequenas bolinhas.
To make the designs on the nails I used these small beads.


Para colocar as bolinhas do "caviar" usei uma dotting tool, usei a bolinha mais pequena.
To put the balls of "caviar" I used a dotting tool, I used the smaller ball.


TUTORIAL:

 1. Aplicar uma base para proteger a unha.
1. Apply a base coat to protect the nail.


2. Aplicar uma camada do vernizes escolhidos para o fundo/base da nail art.
2. Apply a layer of nail polishes chosen for the background / base of the nail art.


3. Aplicar uma segunda camada desse mesmos vernizes.
3. Apply a second coat of the same nail polishes.


4. Com a ajuda de uma dotting tool, criei vários desenhos. Aqui fiz metade azul e metade branco.
4. With the help of a dotting tool, I created different designs. Here I made half blue and half white.


4. Aqui fiz uma linha no meio da unha com as bolinhas brancas.
4. Here I made a line down the middle of the nail with white beads.


4. Aqui fiz um pequeno coração junto à cutícula com as bolinhas brancas. 
4. Here I made a little heart next to the cuticle with white beads.


4. Nesta unha fiz um zig-zag com as bolinhas azuis.
4. This nail I did a zig-zag with blue beads.


 4.  Nesta unha fiz um grande coração com as bolinhas azuis.
4. In this nail I did a big heart with blue beads.


5. Por último, apliquei um topcoat para proteger o desenho.
5. Finally, I applied a topcoat to protect the design.

Espero que tenham gostado.
i hope you enjoyed.

Ana Mendes